How to install Jekyll ? A step by step tutorial for beginners
Jekyll is a free, open-source, static site generator that makes it easy to build websites. Unlike CMS (Content Management System), Jekyll creates static HTML files that you can easily host on any Web server. This approach has several benefits, such as faster loading times, better security, and fewer hosting requirements.
Jekyll is written in Ruby and is built from the ground up for ease of use. Developers, Bloggers, and Content Creators can use Jekyll to focus on content creation without having to worry about complex databases or scripting server-side. Markdown is used for content creation, while Liquid templating is used for dynamic elements. Jekyll is easy to use for users of all levels of experience.
One of the best things about Jekyll is that it integrates seamlessly with the popular web publishing platform, GitHub Pages. You can host your site powered by Jekyll directly from a repository on GitHub. This integration makes it easy to build and deploy your site, making it a great choice for developers looking for an easy way to publish content online.
Prerequisites
There are a few things you need to do before you can install Jekyll. The following are the most important prerequisites:
Jekyll, also known as Jekyll Ruby Gem, is a Ruby gem that is compatible with most operating systems.
Ruby version 2.5.0 or higher, including all development headers. You can check your Ruby version using the below command,
ruby -v
RubyGems, You can check your Gems version using the below command,
gem -v
GCC and Make, You can check your GCC and make versions using below commands respectively,
gcc -v,g++ -v
make -v
For more detailed installation instructions, please refer to the operating system guide below.
Project Structure
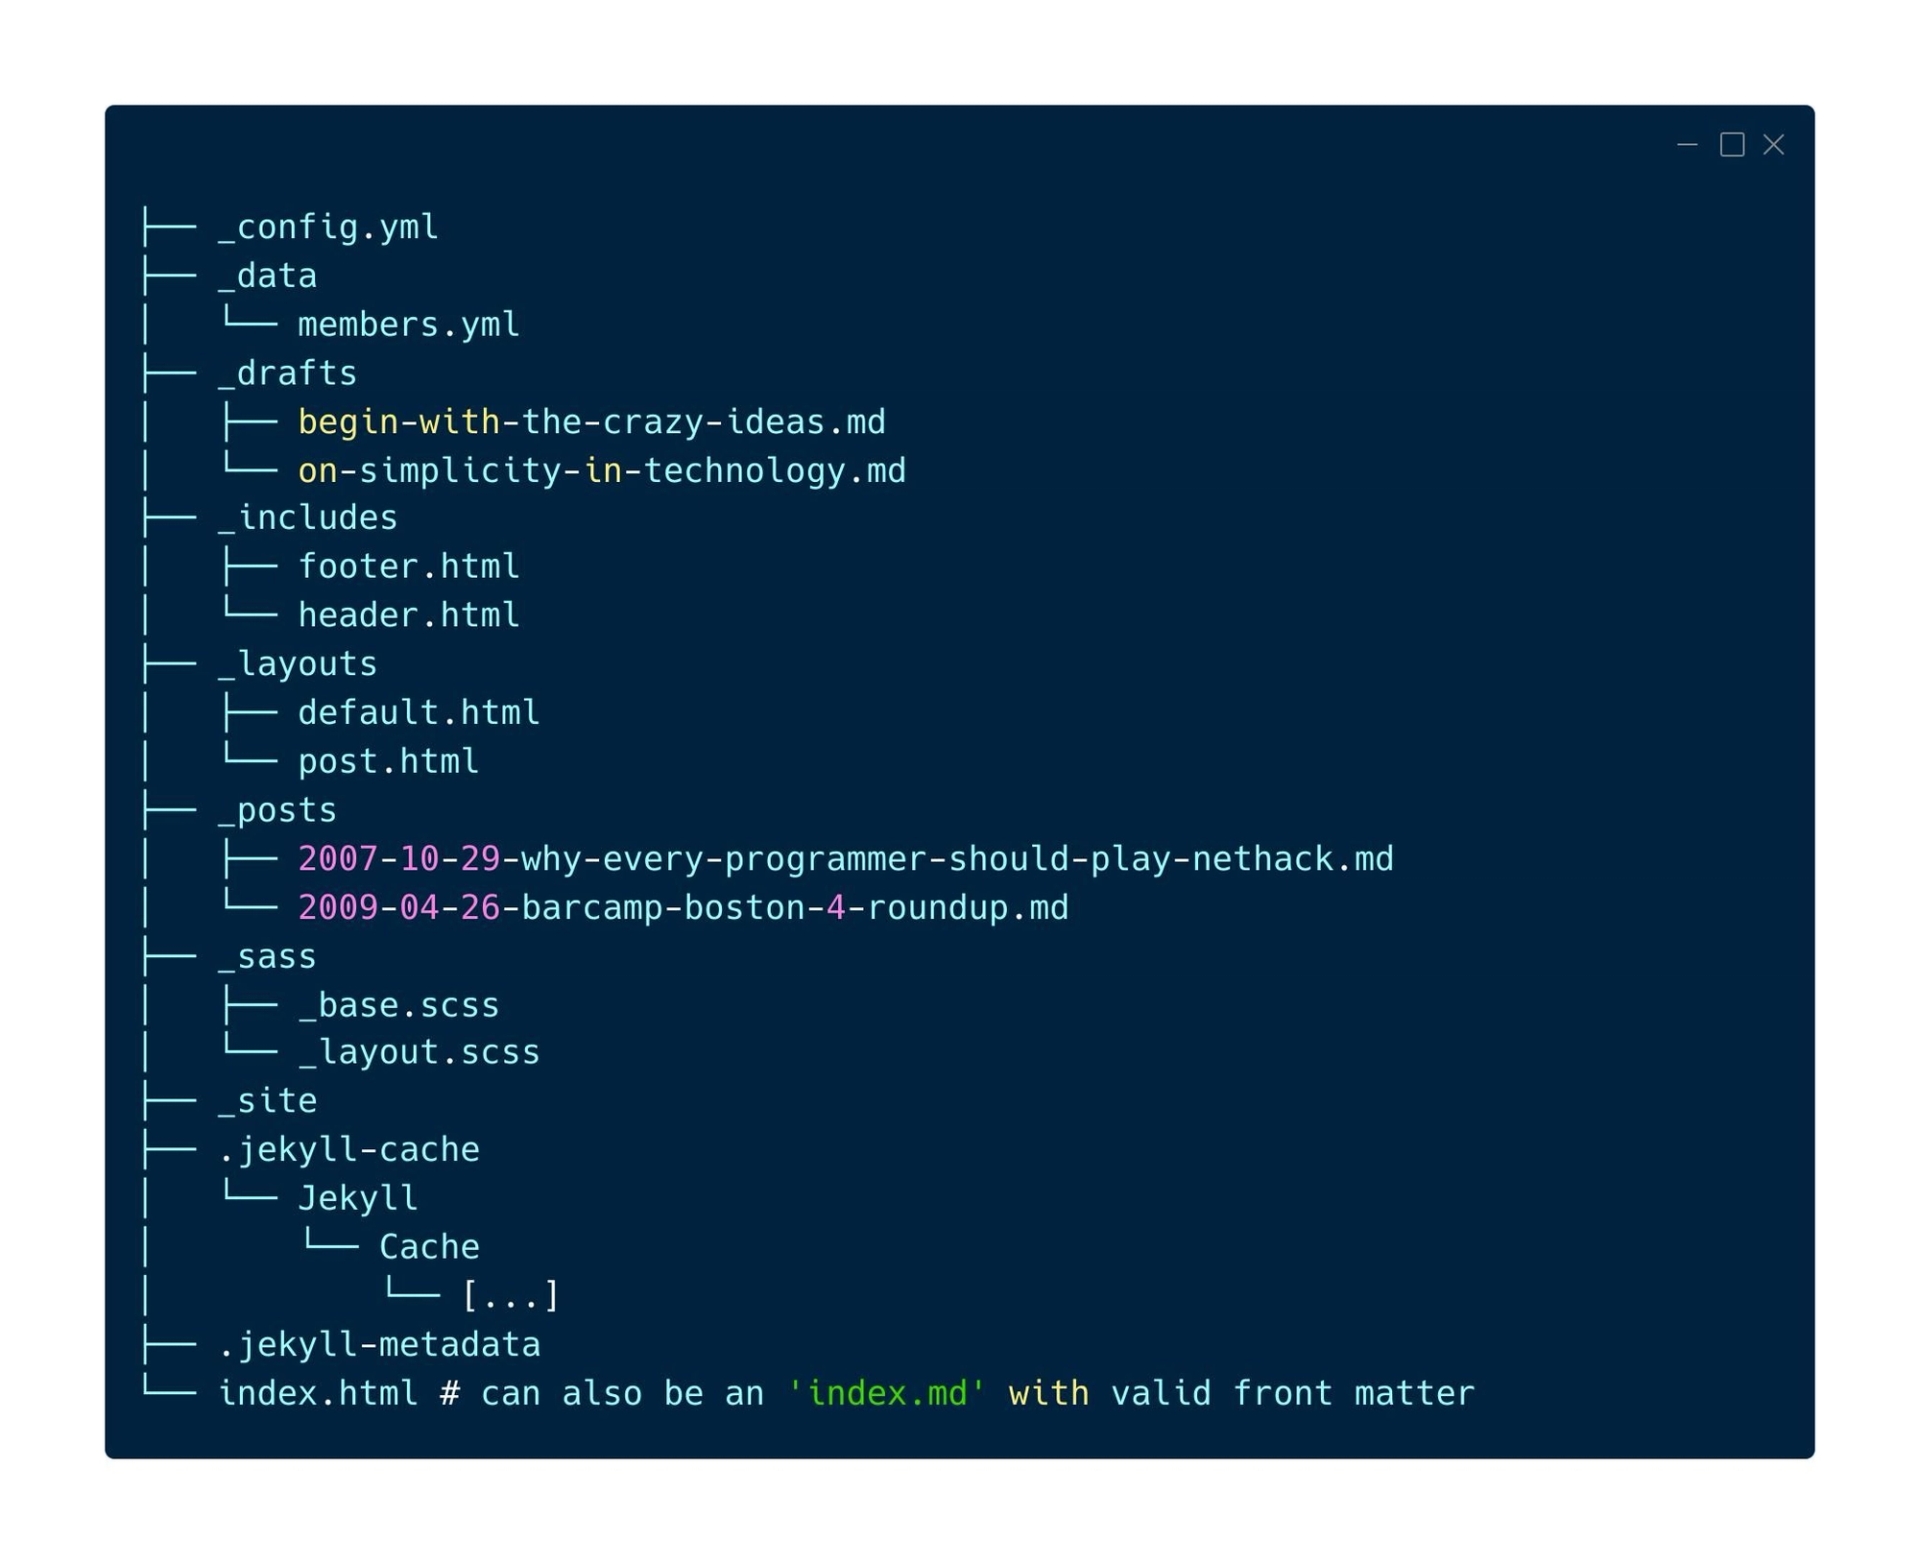
A typical Jekyll website will look like this,


_config.yml: Stores the configuration data. Most of these can be found in the command line executable, but it is simpler to define them here so that you do not have to remember them.
_drafts: Drafts are posts that have not yet been published. These files are in the format of a single file (Title. MARKUP) with no date.
_includes: These are the partial files that you can combine with your layouts and your posts to make it easier to reuse. Using the liquid tag, you can include the partial file in _includes / file.ext.
_layouts: These are the post-wrap templates. The post layouts are selected post-post in the front matter, as explained in the following section. The content is injected via the liquid tag {{ contents }}.
_posts: Your dynamic content, you know what I mean? The name of these files is very important, and it must be in the following format,
Year-Month-Day-Title: YEAR-MONDAY-Title.MARKUP
Permalinks can be changed for each post.
Date and markup language are only defined by the file name.
_data: Place well-structured site data here. Jekyll will automatically load all data files (in.yml format,.yaml format ,.json format ,.csv format, or.tsv format) in this directory. These files will be accessible via ‘site.data’. If there is a file named member.yml under this directory, then the contents of the file can be accessed via site.data.member.yml.
_sass: These are Sass Partials, which you can import into your master.scss. They will then be compiled into a single main.css stylesheet, which defines the styles that your site will use.
_site: This is the default location of the generated site after Jekyll has finished transforming it. You may want to include this in the.gitignore.
.jekyll-cache: Makes a copy of generated pages and/or markup (such as markdown) so that it can be served faster. This is created when you use Jekyll serve, for example. This can be disabled with the option “kill” and/or “flag”. This directory will not appear on your generated site. You may want to add it to your “gitignore” file.
.jekyll-metadata: This allows Jekyll to keep track of the files that haven’t been changed since the last build of the site, and the files that will require regeneration on the upcoming build.
This file is only created when incremental regeneration is used (i.e.: jekyll service -I).
This file will not appear on your generated site. You may want to add this file to your.gitignore file.
index.html or index.md and other HTML, Markdown files: If the file contains a front section, Jekyll will transform it. The same thing will be done for any files in your site's root directory (.html,.markdown,.md,.textile) or other directories not mentioned above.
Other Files/Folders: In addition to the above-mentioned exceptions, all other directories and files (such as CSS folders, images folders, favicons.ico files, etc.) will be copied directly into the generated site. Many sites already use Jekyll, if you want to see how they are organized.
In the source directory, all files or directories starting with., _, # or ~ will not be copied over to the destination directory. These paths must be specified explicitly in the config file using the include directive.
include:
_pages
_.htaccess
How to get started?
All of the above must be installed with your chosen operating system.
Once you have installed all the above-mentioned dependencies, go ahead and install the Jekyll gem and the bundler gems.
gem install jekyll bundler
After executing the above command, make a new folder in your preferred directory name, for example, “./myblog”.
jekyll new myblog
Go to the folder myblog and run the following command,
cd myblog
You can now publish it to your local server http://localhost:4000 by running the following command,
bundle exec jekyll serve
Conclusion
Bravo🎉 You've successfully installed Jekyll and taken your first steps into the captivating world of static site generation. From here, let your creativity flow, customize your site, and explore the vast landscapes of Jekyll plugins. The journey has just begun, and your digital adventure awaits!
